All About The Weather: 9 Science Projects To Keep Yourselves Busy
While learning about weather we did a lot of hands-on projects and experiments. In this post I share some of our favourites.
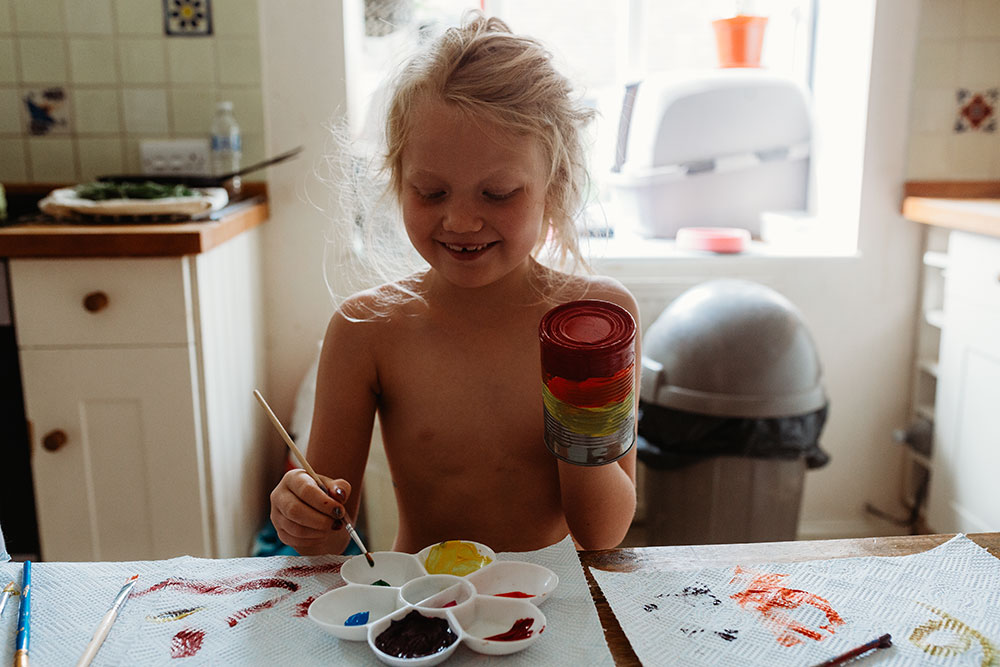
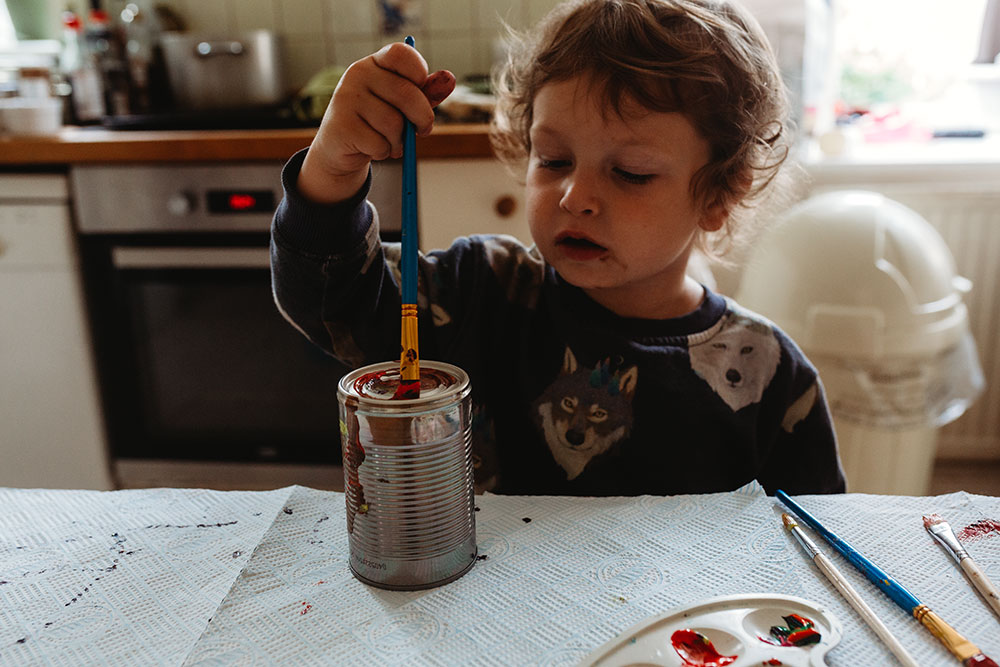
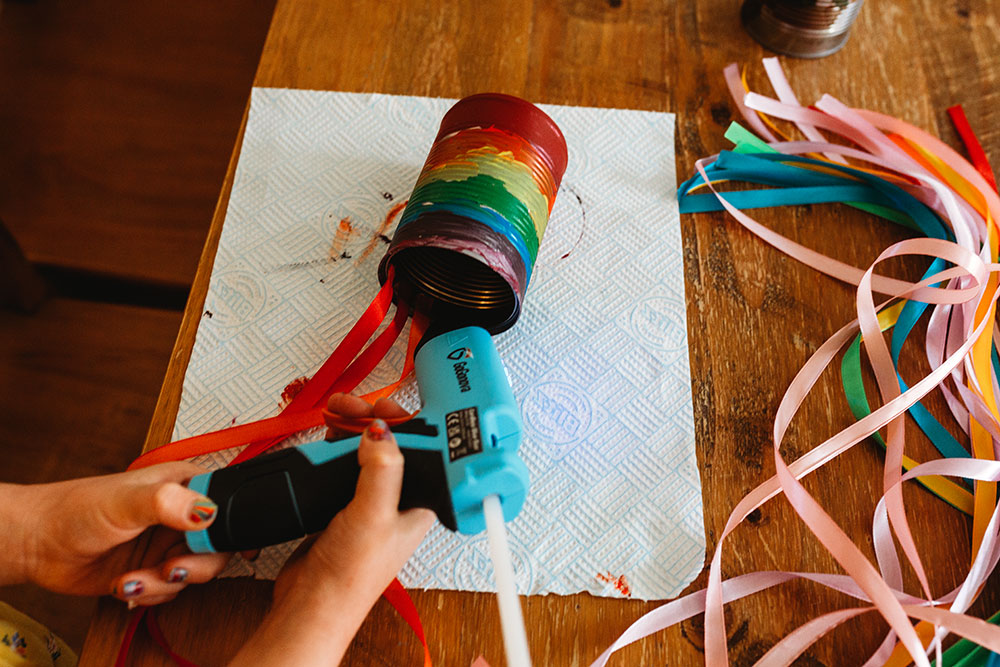
Rainbow Windsock
Thought I'd start this list off with the classic windsock. These can be used as a very basic guide to wind direction and speed.
What You'll Need:
- an old tin
- paint
- ribbon
- glue gun
- scissors
- something to poke a hole in the top of the tin
What To Do:
- First paint your tin in whatever colour you like or in rainbow colours like we did
- then cut maybe 1/2 meter length of ribbon in rainbow colours (several of each colour)
- poke a hole in the top of your tin
- glue your ribbon onto your tin with a glue gun
- add some string to the hole in your tin (double thread it so that you can tie a big giant knot on the other side so that the string stays in place)
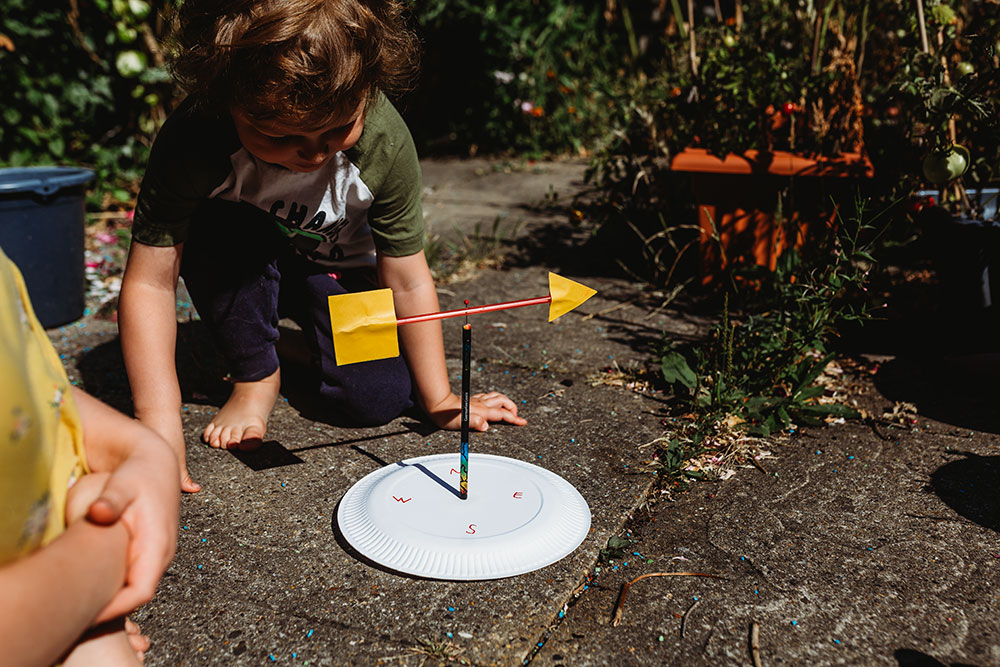
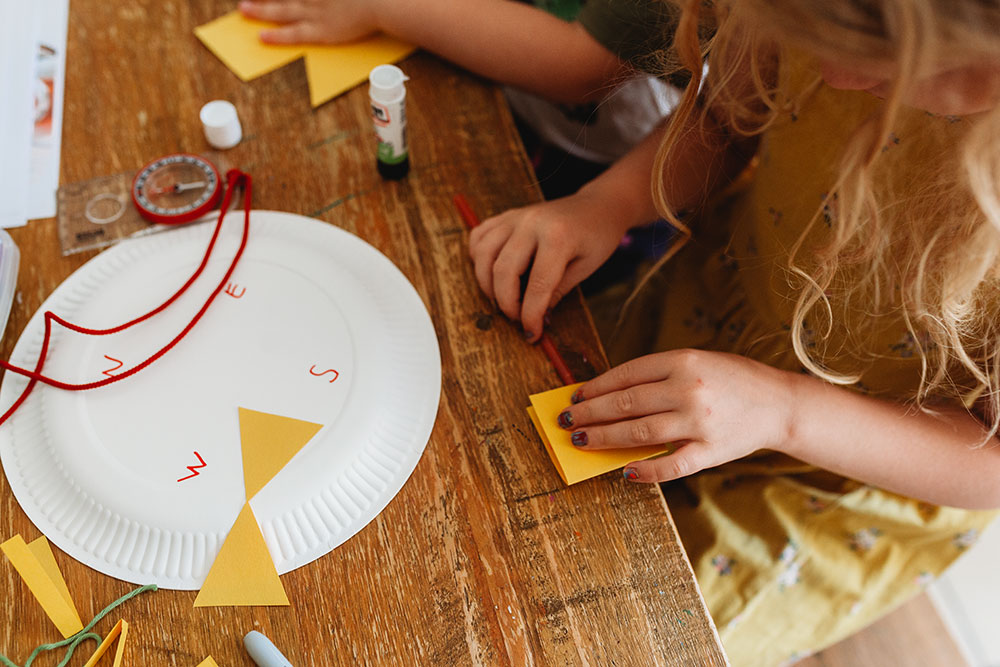
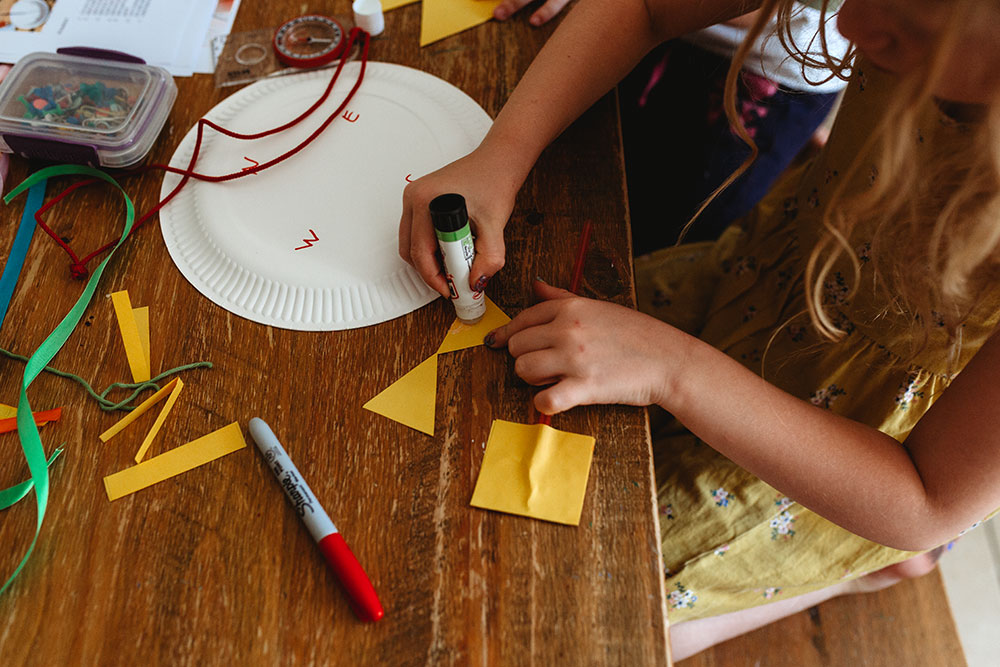
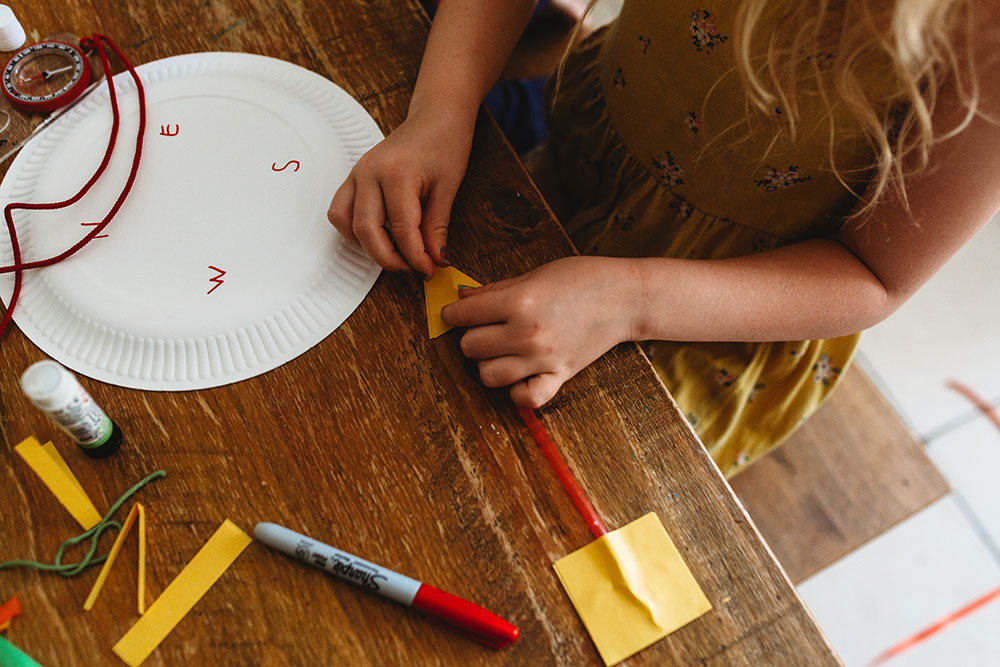
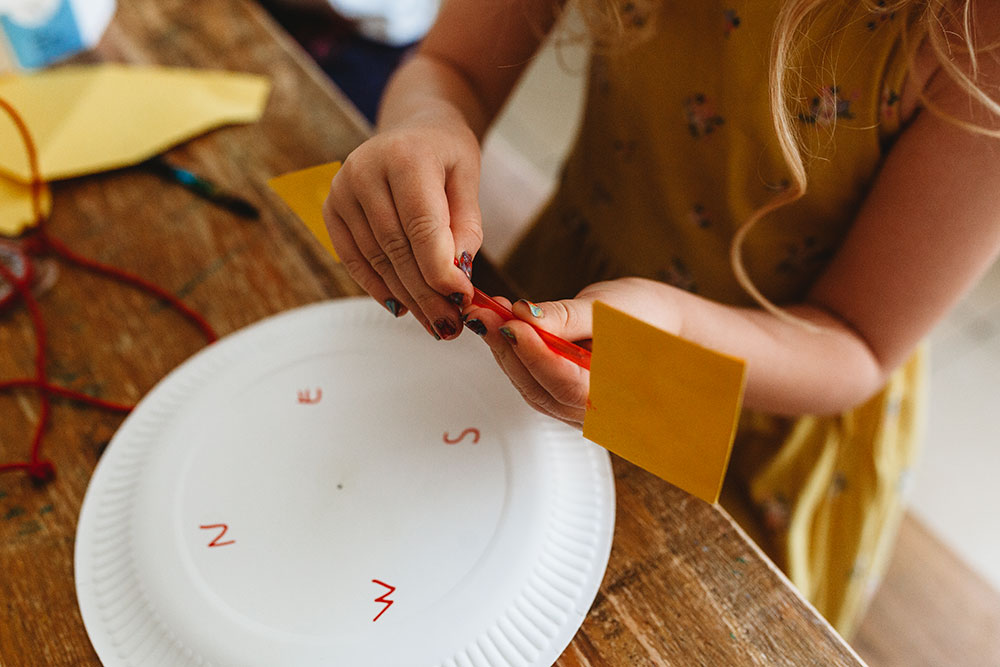
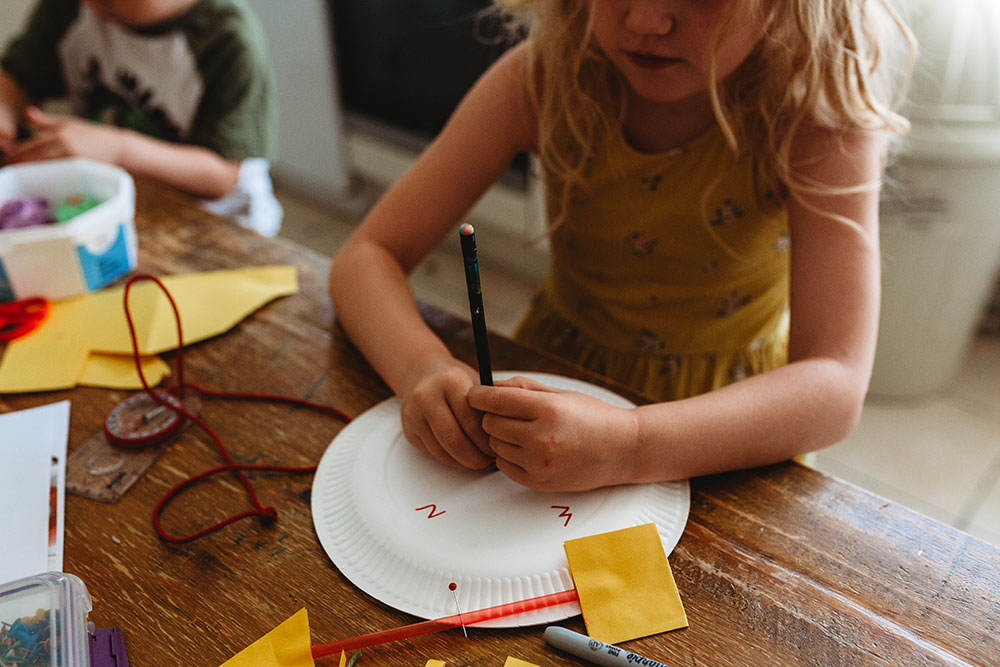
DIY Wind Vane
weather vanes have been in existence and used to help predict the weather for over 2,000 years although they aren't very accurate but knowing which direction the wind is coming from can help us make better predictions about the weather.
What You'll Need:
- straw
- pencil
- plasticine or playdough or something similar
- gluestick
- ball pin
- card stock
- paper plate
- marker

What To Do:
- Grab your paper plate and write your N, E.S & W labels
- make a hole in the centre of your plate
- make your arrow by folding a piece of card in half and cut a small rectangular piece for the end of your arrow and another triangular piece for the front of your arrow.
- now attach those pieces with glue to your straw
- next out your pencil into the centre of the plate with the tip going through and into a ball of plasticine on the other side to hold the plate in place.
- lastly, attach the arrow by placing a ball pen into the centre of the straw and into the eraser part of your pencil.
- now bring it outside to test!
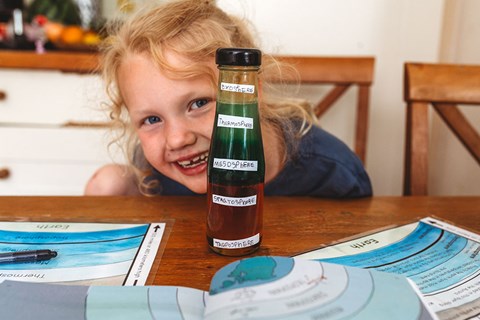
Homemade Thermometer
we had so much fun with this experiment! I was surprised at how easy it was to do and it was a great demonstration to show the kids how thermometers work and how we measure temperatures. Nowadays we are so used to digital thermometers but liquid thermometers have existed for hundreds of years. I even bought a couple for the kids to see and play with around the house.
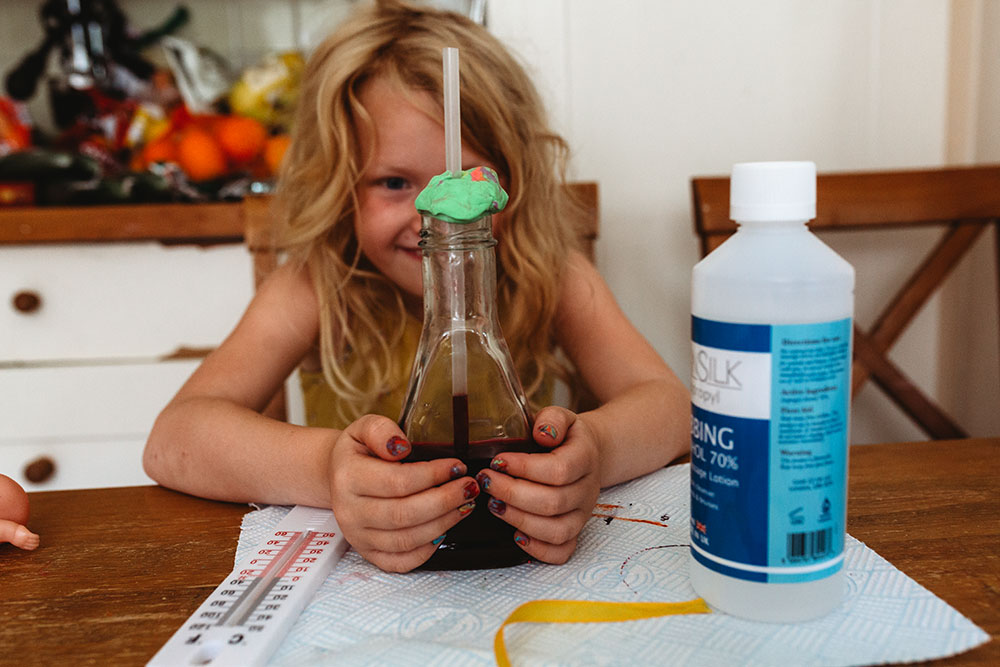
What You'll Need:
- plasticine
- red food colouring
- water
- clear straw
- rubbing alcohol
- small clear bottle with a narrow neck
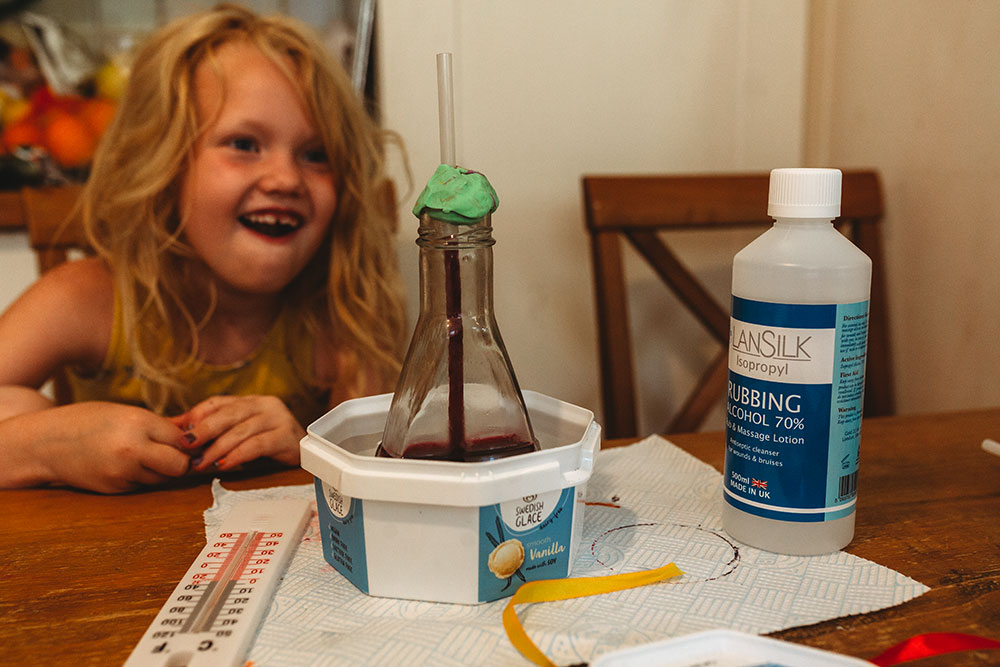
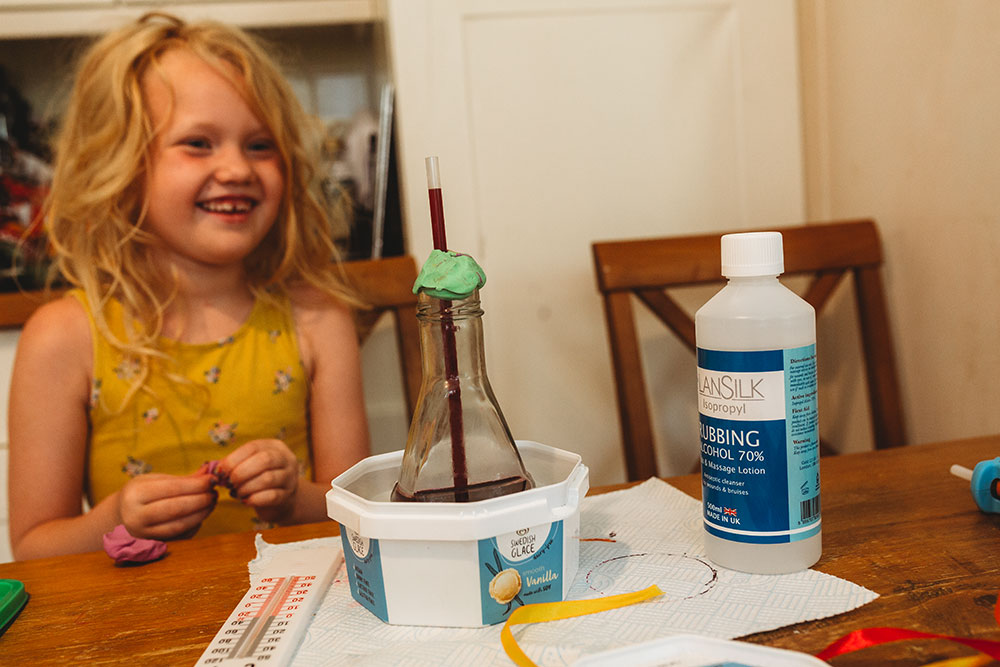
What To Do:
- Pour equal amounts of water and rubbing alcohol into the bottle until it is 1/4 of the way full. Add in a few drops of red food colouring to make it more visible and to look like a thermometer.
- Put the straw into the bottle and wrap the clay tightly around it and the opening of the bottle. Make sure the straw is not touching the bottom of the bottle.
- Now it's time to test it. Place your hands around the bottle to see if the heat from your hands creates any sort of change. You should notice a small reaction.
- Now test it by putting it into a glass of boiling water! Feel free to take it outside in different temperatures to see what happens!
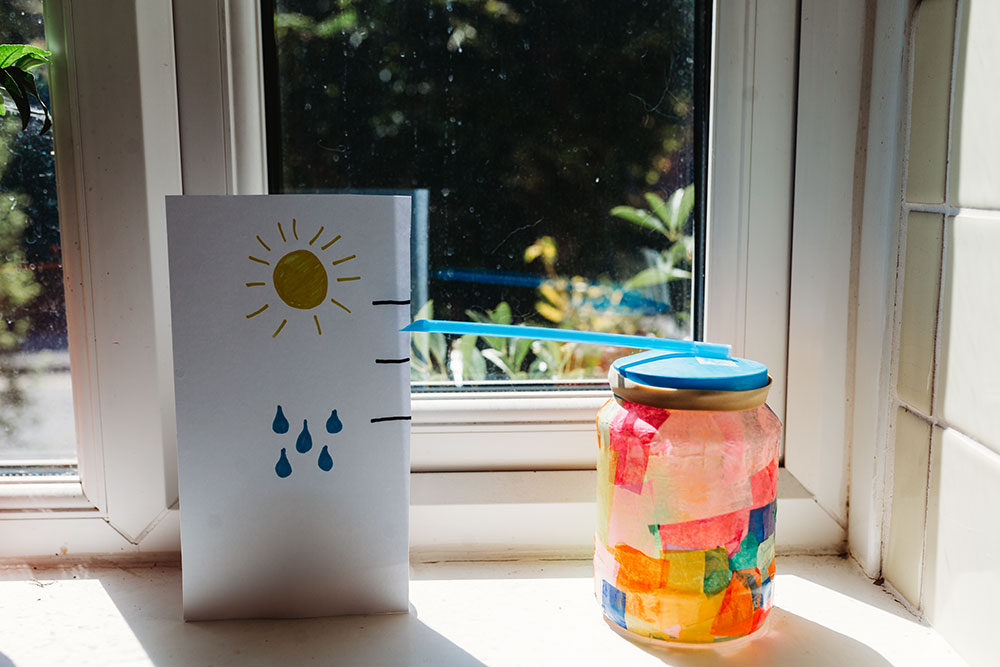
Making A Barometer
A Barometer is an instrument measuring atmospheric pressure, used especially in forecasting the weather and determining altitude and until I did a search for weather science experiments on Pinterest I never knew you could try to make your own! If the pressure inside the jar is greater it pushes the balloon to dome outwards. If the pressure inside the jar is less the outside air molecules push the balloon inwards. The balloon causes the straw to point up or down depending on which way the pressure is greatest.
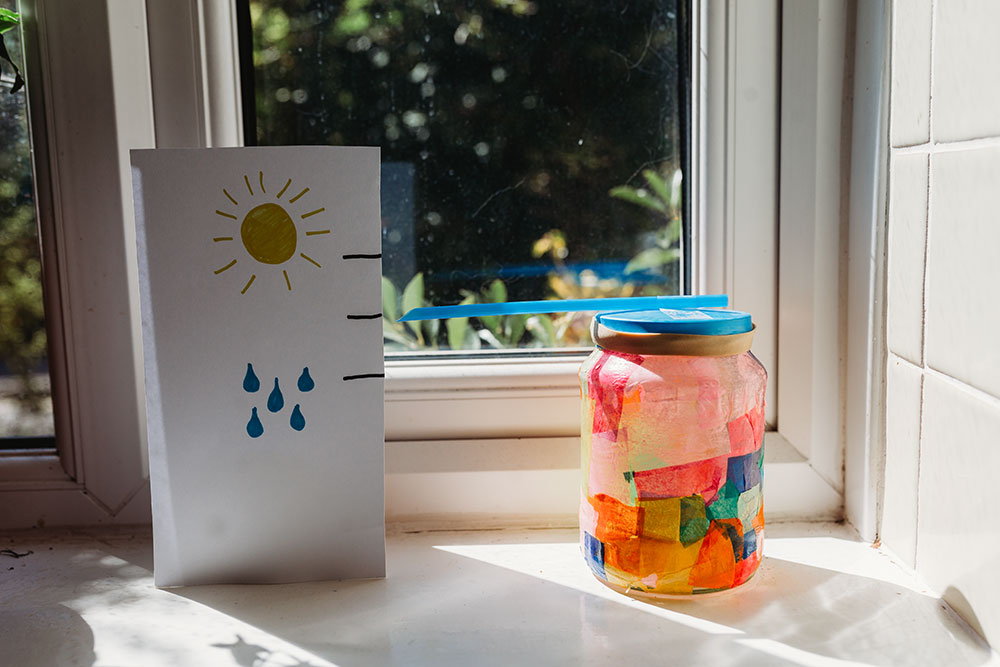
What You'll Need:
- A rectangular piece of white card stock
- markers
- straw
- tape
- balloon
- rubber band
- jar (we used an old lantern jar)
What To Do:
- Take your balloon and cut the neck off
- take the bottom part of your balloon and stretch it over the neck of your jar.
- secure the balloon with an elastic band
- cut your straw at angle to make a pointer
- tape the straw to the centre of the balloon. Make sure the end of the straw ends in the centre.
- on a piece of card draw a sunshine towards the top and raindrops towards the bottom. Marks the paper in the middle where the straw currently rests.
- now wait and observe to see if any changes take place!
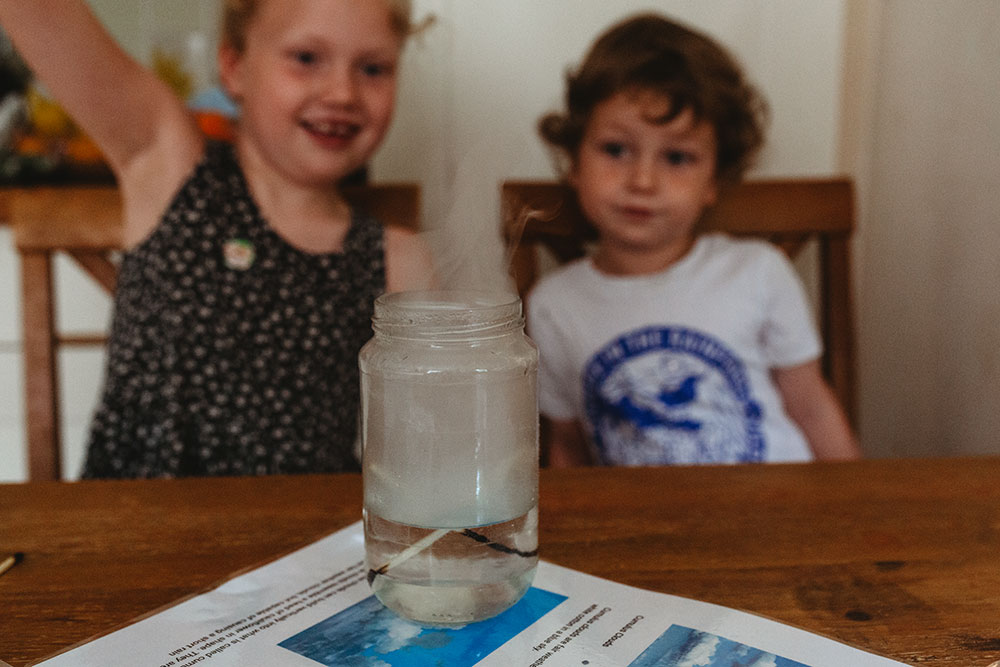
Cloud In A Jar
This is such a fun little project and this was especially for Forrest's benefit as he had never done it before.
What You'll Need:
- glass jar
- matches
- lighter
- hot water
- ice in a sandwich bag
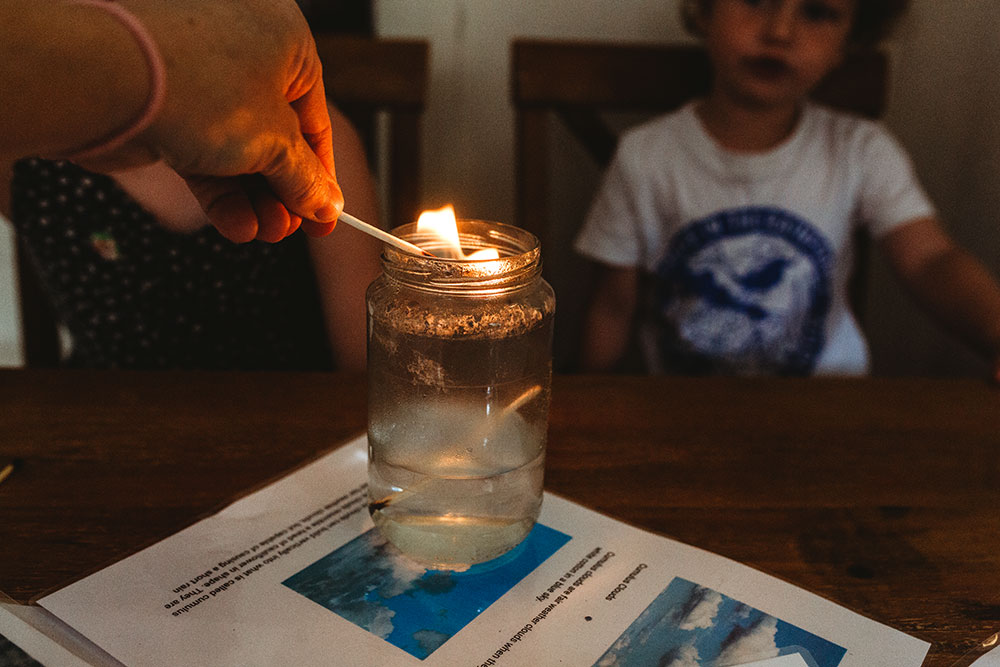
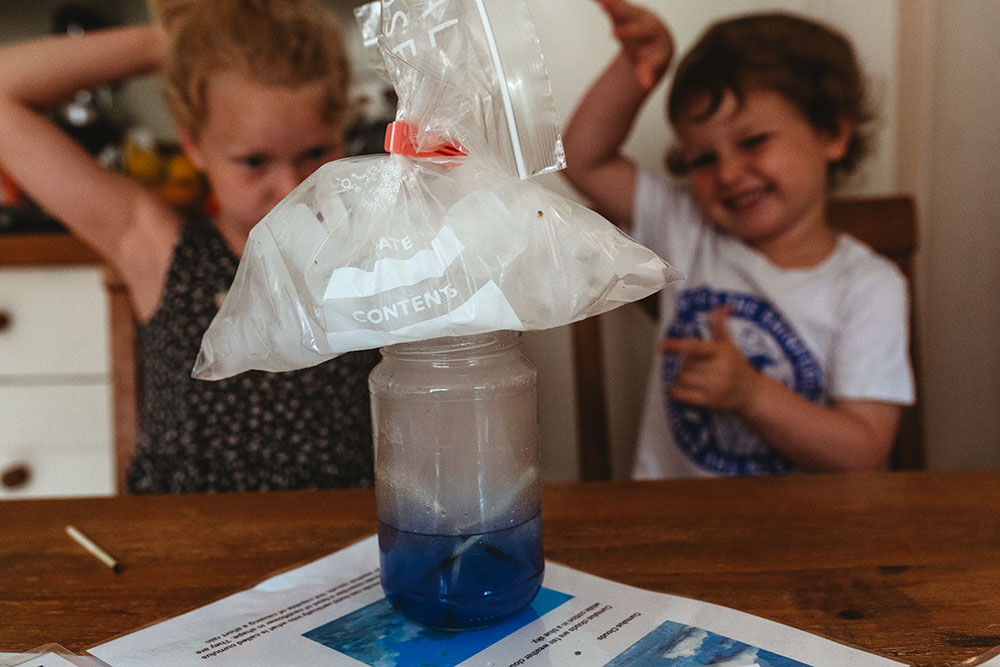
What To Do:
- Add a couple of inches of hot water to your jar
- Now light a match and let it go out inside the jar and quickly cover your jar with your bag of ice sealing it shut
- now watch as condensation and "clouds" slowly begin to form and once it becomes thick take the lid off and watch your cloud leave the jar!
- The kids loved this and we did it several times! oh and as you can see in the images we added blue food colouring at one point because Nixie needed to know if it would make a blue cloud.
Rain cloud Experiment
This was another little experiment we did purely for Forrest's benefit as we have done this several times when Nixie was younger.
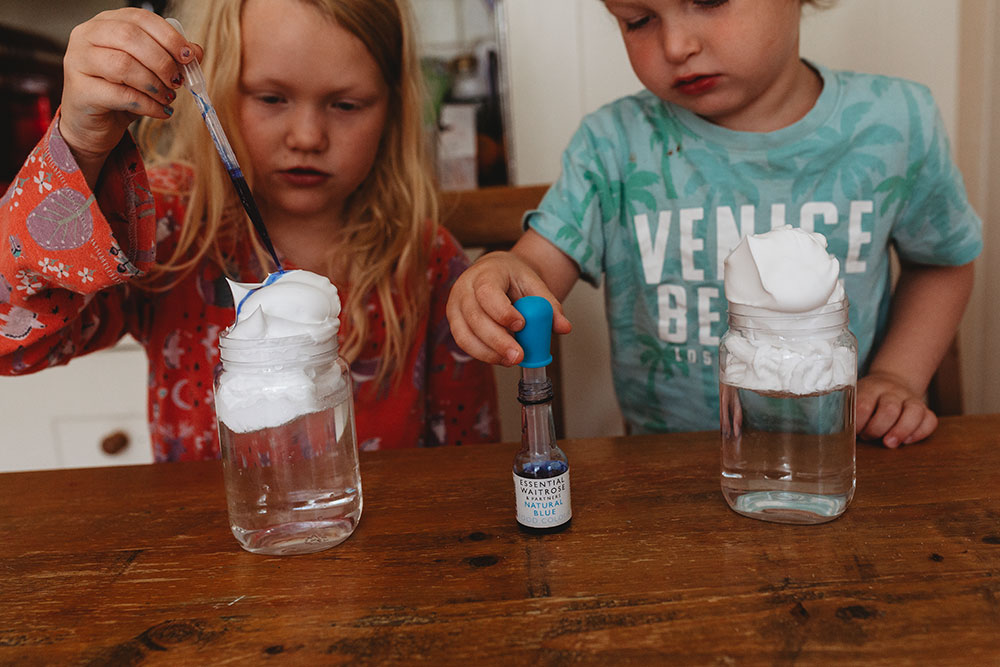
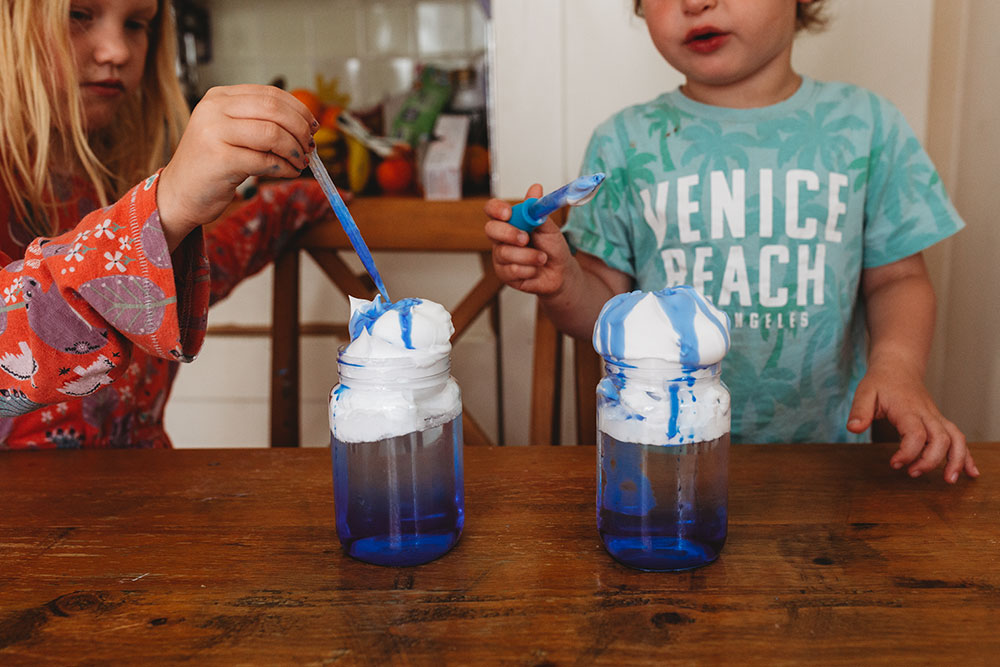
What You'll Need:
- Jars
- Shaving cream
- pipettes
- blue food colouring
- water
What To Do:
- fill your jar almost to the top with water
- add your shaving cream
- take your dropper and add food colouring to it and watch the rain appear! (you could dilute your food colouring but the kids wanted to do it directly from the little jar)
STEM Challenge: Building a Hurricane Proof Structure
This ended up being a really fun family project! Me and Forrest worked as a team and he was the designer and I was the builder.
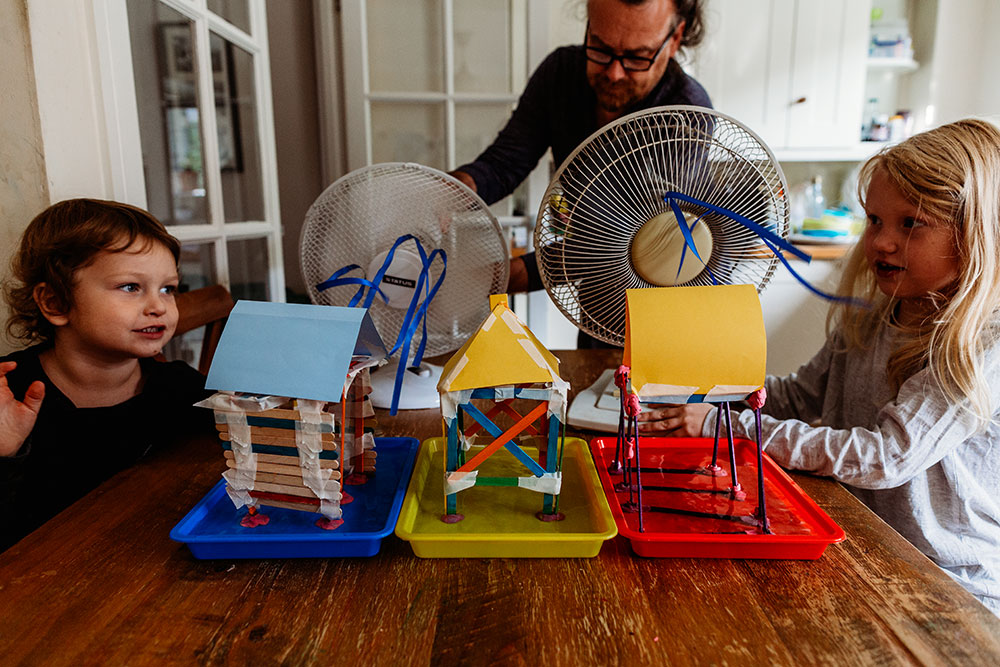
What You'll Need:
- plasticine
- lollipop sticks
- masking tape
- cardstock
- water
- trays for your structure to stand in
- fans
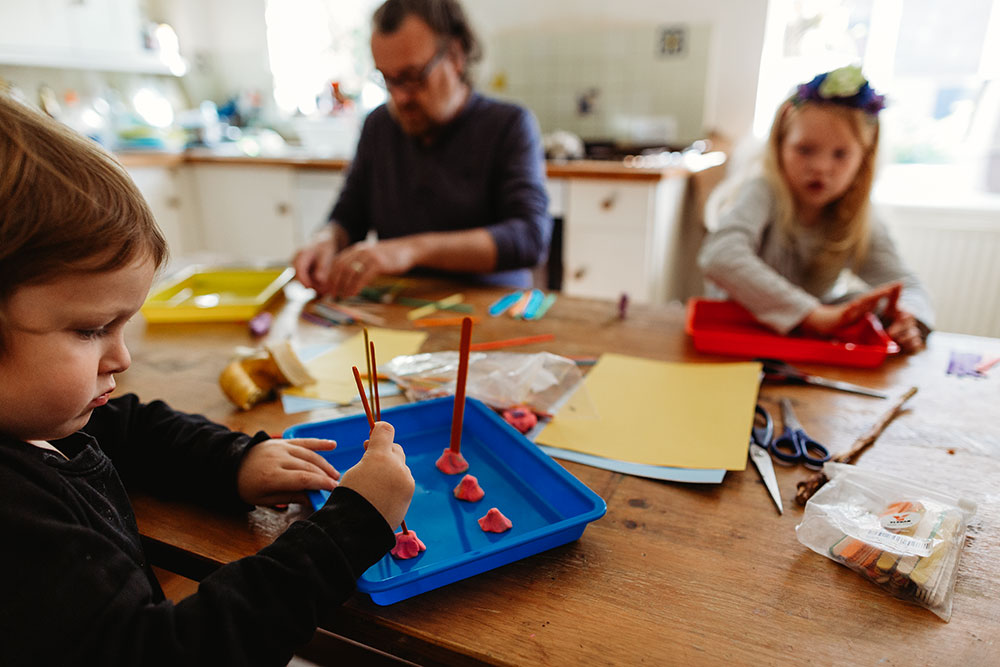
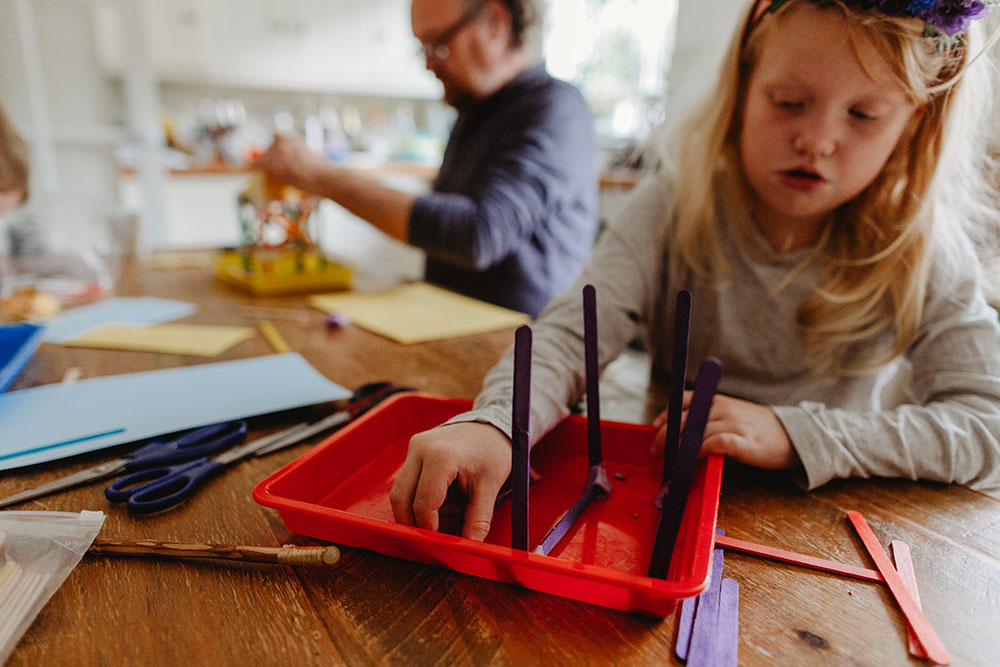
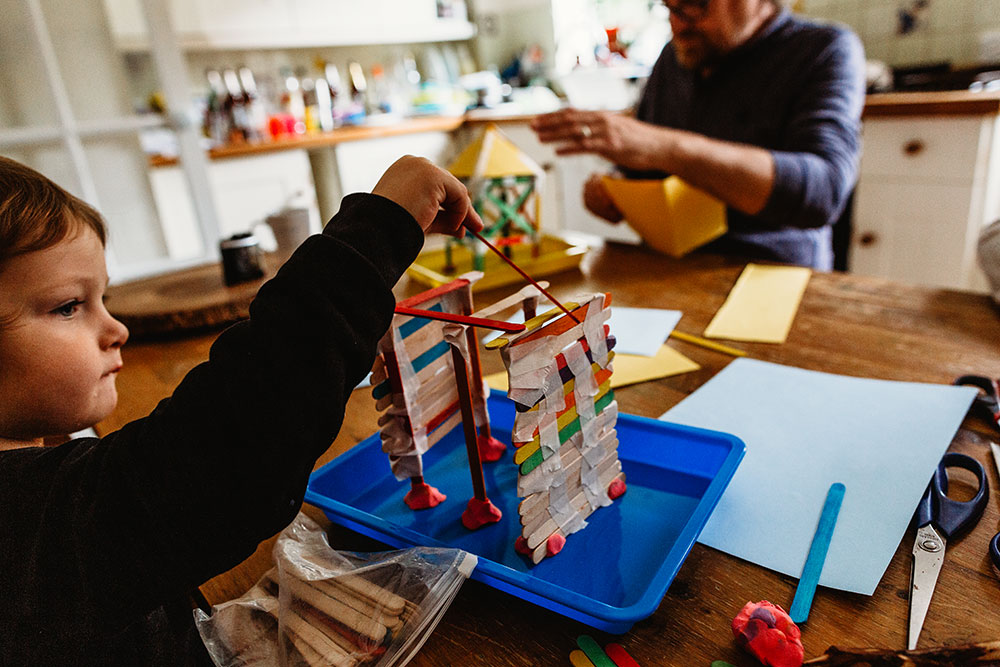
What To Do:
- first grab your container which will be your base and add plasticine to anchor your house
- next use your imagination and come up with a sturdy design!
- once finished test how strong your structures are by blowing a fan onto them
Grow A Rainbow!
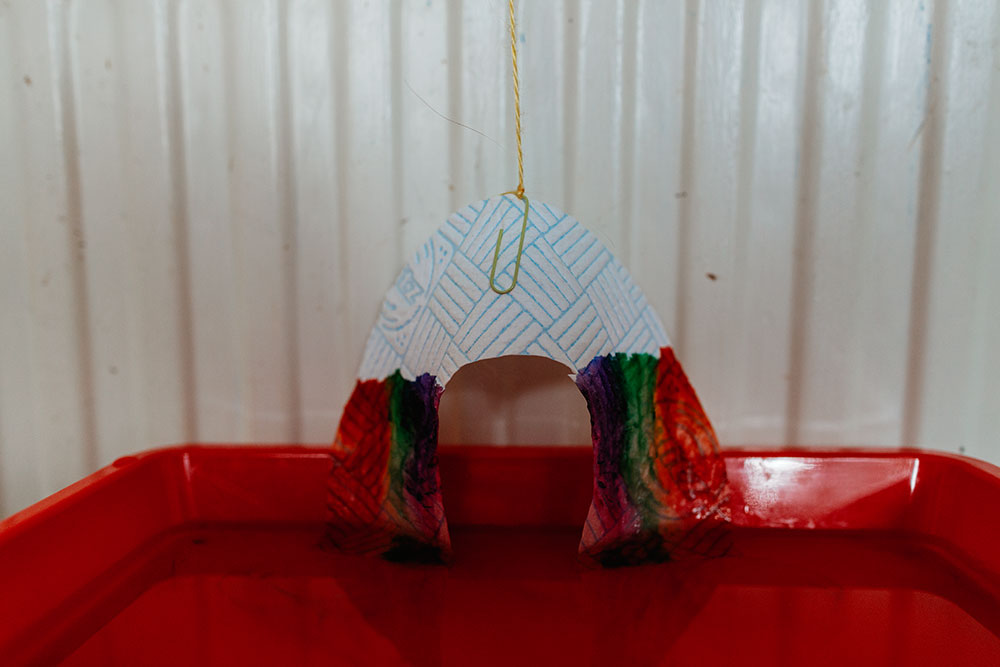
What You'll Need:
- paper towel
- washable markers
- water
- scissors
- a tray of water
- paperclip
What To Do:
- Add a lot of marker to the edge of the rainbow paper towel
- add a string and paper clip to the paper towel to hold it up and attach to something (we just used our radiator!)
- don't place the towel too deep into the water
- and now just watch as your rainbow grows!
Skittle Rainbow Experiment
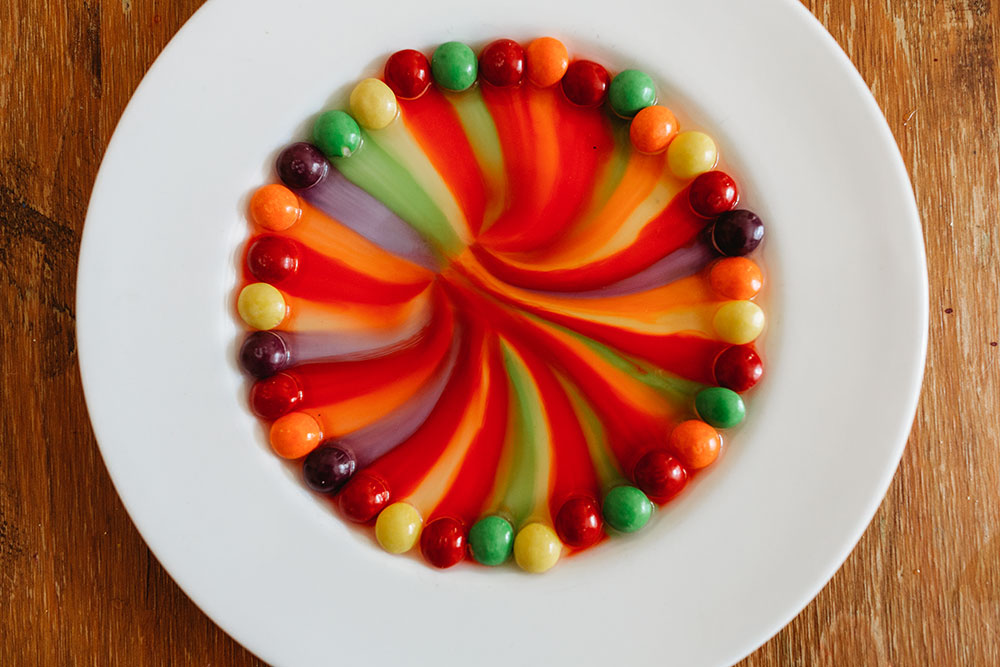
What You'll Need:
- skittles
- hot water
- plate
What To Do:
- Arrange the Skittles in a circle on the plate.
- carefully add hot water into the middle of the plate so that the sweets are half submerged
- watch as the colour of the sweets slowly start to spread towards the middle of the plate!